Installing House Wrap

installing house wrap
Some great strides have been made to enhance door and window installations. One of them is the use of house wraps and prevent water infiltration. When building wraps first came into play they were marketed and first thought of as a wind or air barrier. Now we know, they also are great at shedding unwanted water away from the interior of buildings. Installing house wrap correctly is vital to ensuring water is shed out and away from the building. 

Correctly Installing House Wrap

Start by wrapping the complete exterior of the building, even the gable ends. Be sure to start at the bottom and complete everything in a “shingle” method of installation. This just means to start at the bottom and overlap everything as you work your way up. Gravity pulls water down the building and as long as everything is overlapped it should make its way down to the bottom of the building and drip harmlessly to the ground.

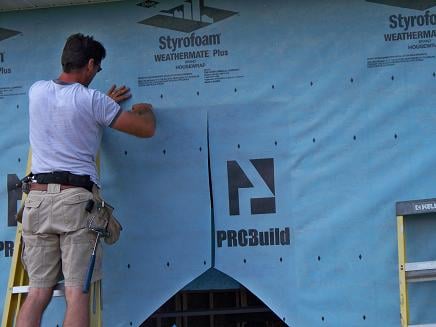
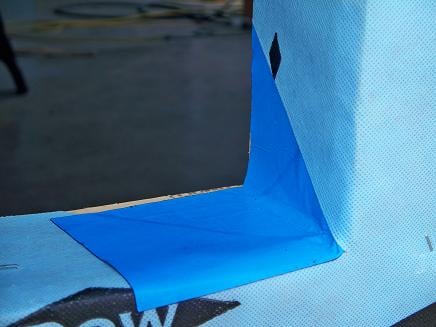
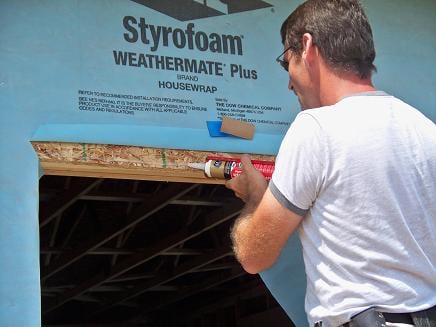
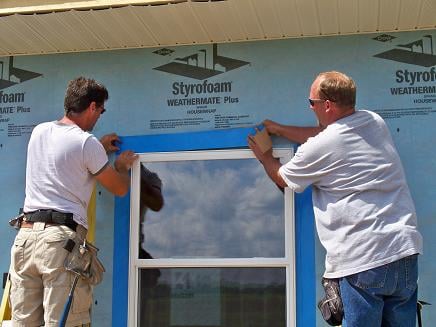
When installing windows simultaneously with installing house wrap, make what is called a “martini” cut in the window opening. As you can see the cut looks like an upside down martini glass.

installing house wrap
A critical area is the sill portion, or the bottom corners of the window. Here I take a 10 inch piece of window tape and bend it in half. Pull back the house wrap and apply the first 5 inches up the jack stud of the window opening. Then apply the last 5 inches on top of the house wrap that is stapled to the window sill. Be aware this is my method of installation.

There are many products on the market today to use on window and door sills. Some great, some not so great. I do not advocate not using or using these products. Just be sure to read and follow any manufacturers directions. Failure to follow them could result in a void of your warranty.

installing house wrap
As you can see, the shingle method of installing the tape under the side and over the sill portion, will allow water to work itself down the outside of the building. Just be sure to caulk the area where the tape meets the 45 degree angle cut at the bottom, as there will be a small pinhole that water could penetrate.
installing house wrap
Next, cut the house wrap in the upper corners on a small 45 degree angle. This cut should just be enough to easily fit the window flange under. Tape the wrap out of the way to caulk and install the window.

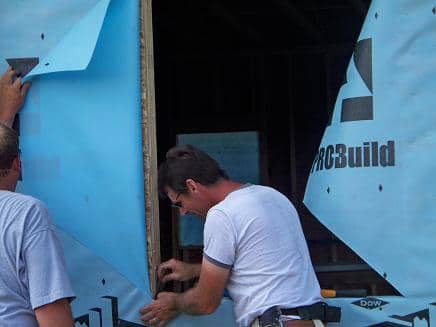
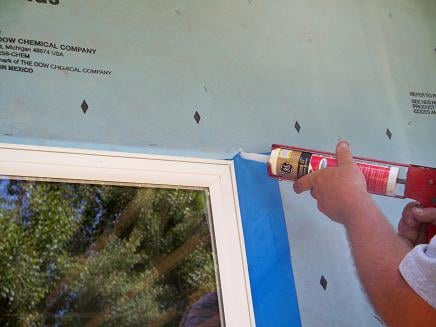
Then your can apply caulking around the top and sides of the rough opening. Most recommend not to caulk the bottom or sill to allow any water to get out if it does make it’s way into the opening. In my opinion, if the rest of the installation is done correctly then no water should penetrate anyways. I’ll leave that one up to you. “To caulk or not to caulk” the sill.

installing house wrap
Center your window in the rough opening and level the sill. Once you have it level, place nails in each bottom corner.
installing house wrap
Plumb the sides of the window with your level, then place a nail in one side of the window flange near the top. Now you can measure diagonally, corner to corner. Do this on both sides. If the two dimensions are not equal… guess what, your window is not square. Adjust as necessary. Having a window installed square is critical to years of smooth operation.

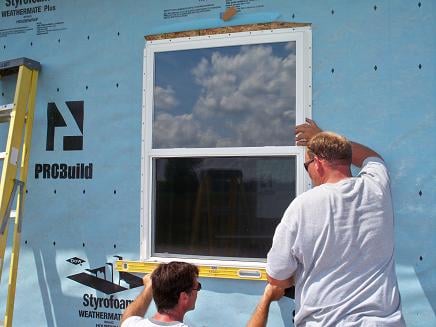
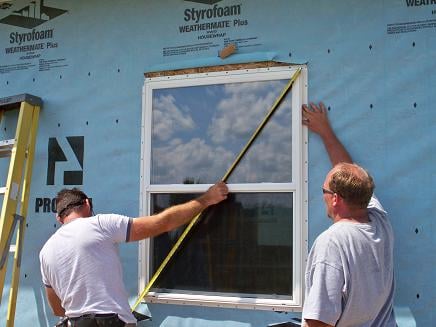
Once you have everything plumb, level and square; finish nailing the perimeter of the window.

installing house wrap
Apply window tape, again in a shingle fashion, starting at the bottom. Be sure to slide the side window tape under the 45 degree cut at the top of the window and caulk the joint to assure it is water tight.
installing house wrap
Some say the installation is complete. I like to install one more piece of window tape at the top to ensure the installation will shed any unwanted water. Adding this extra step while installing house wrap could be the difference in successfully shedding water far into the future. 
installing house wrap
For more information, check out our post on installing windows.

Door Installation Has Never Been Easier

  • Install 5X Faster
  • Eliminate Shims
  • Perfect Fit Every Time


Previous

Next

building inspection

Want to Save Time and Frustration?

Join our mailing list to receive the best home improvement tips, tricks, and how-to guides, along with exclusive discounts on EZ-Hang!


Thanks for subscribing! We look forward to helping you with all your home improvement needs!